
This Christmas, frame the emotion
Create custom mountboards with precision and speed!

A creative idea to make your Christmas frames truly unique
Christmas is the perfect moment to elevate your craftsmanship and offer personalized creations that genuinely inspire emotion. With the Nexus Edge V, your mountboards come to life through precise, fast, and professional cutting.
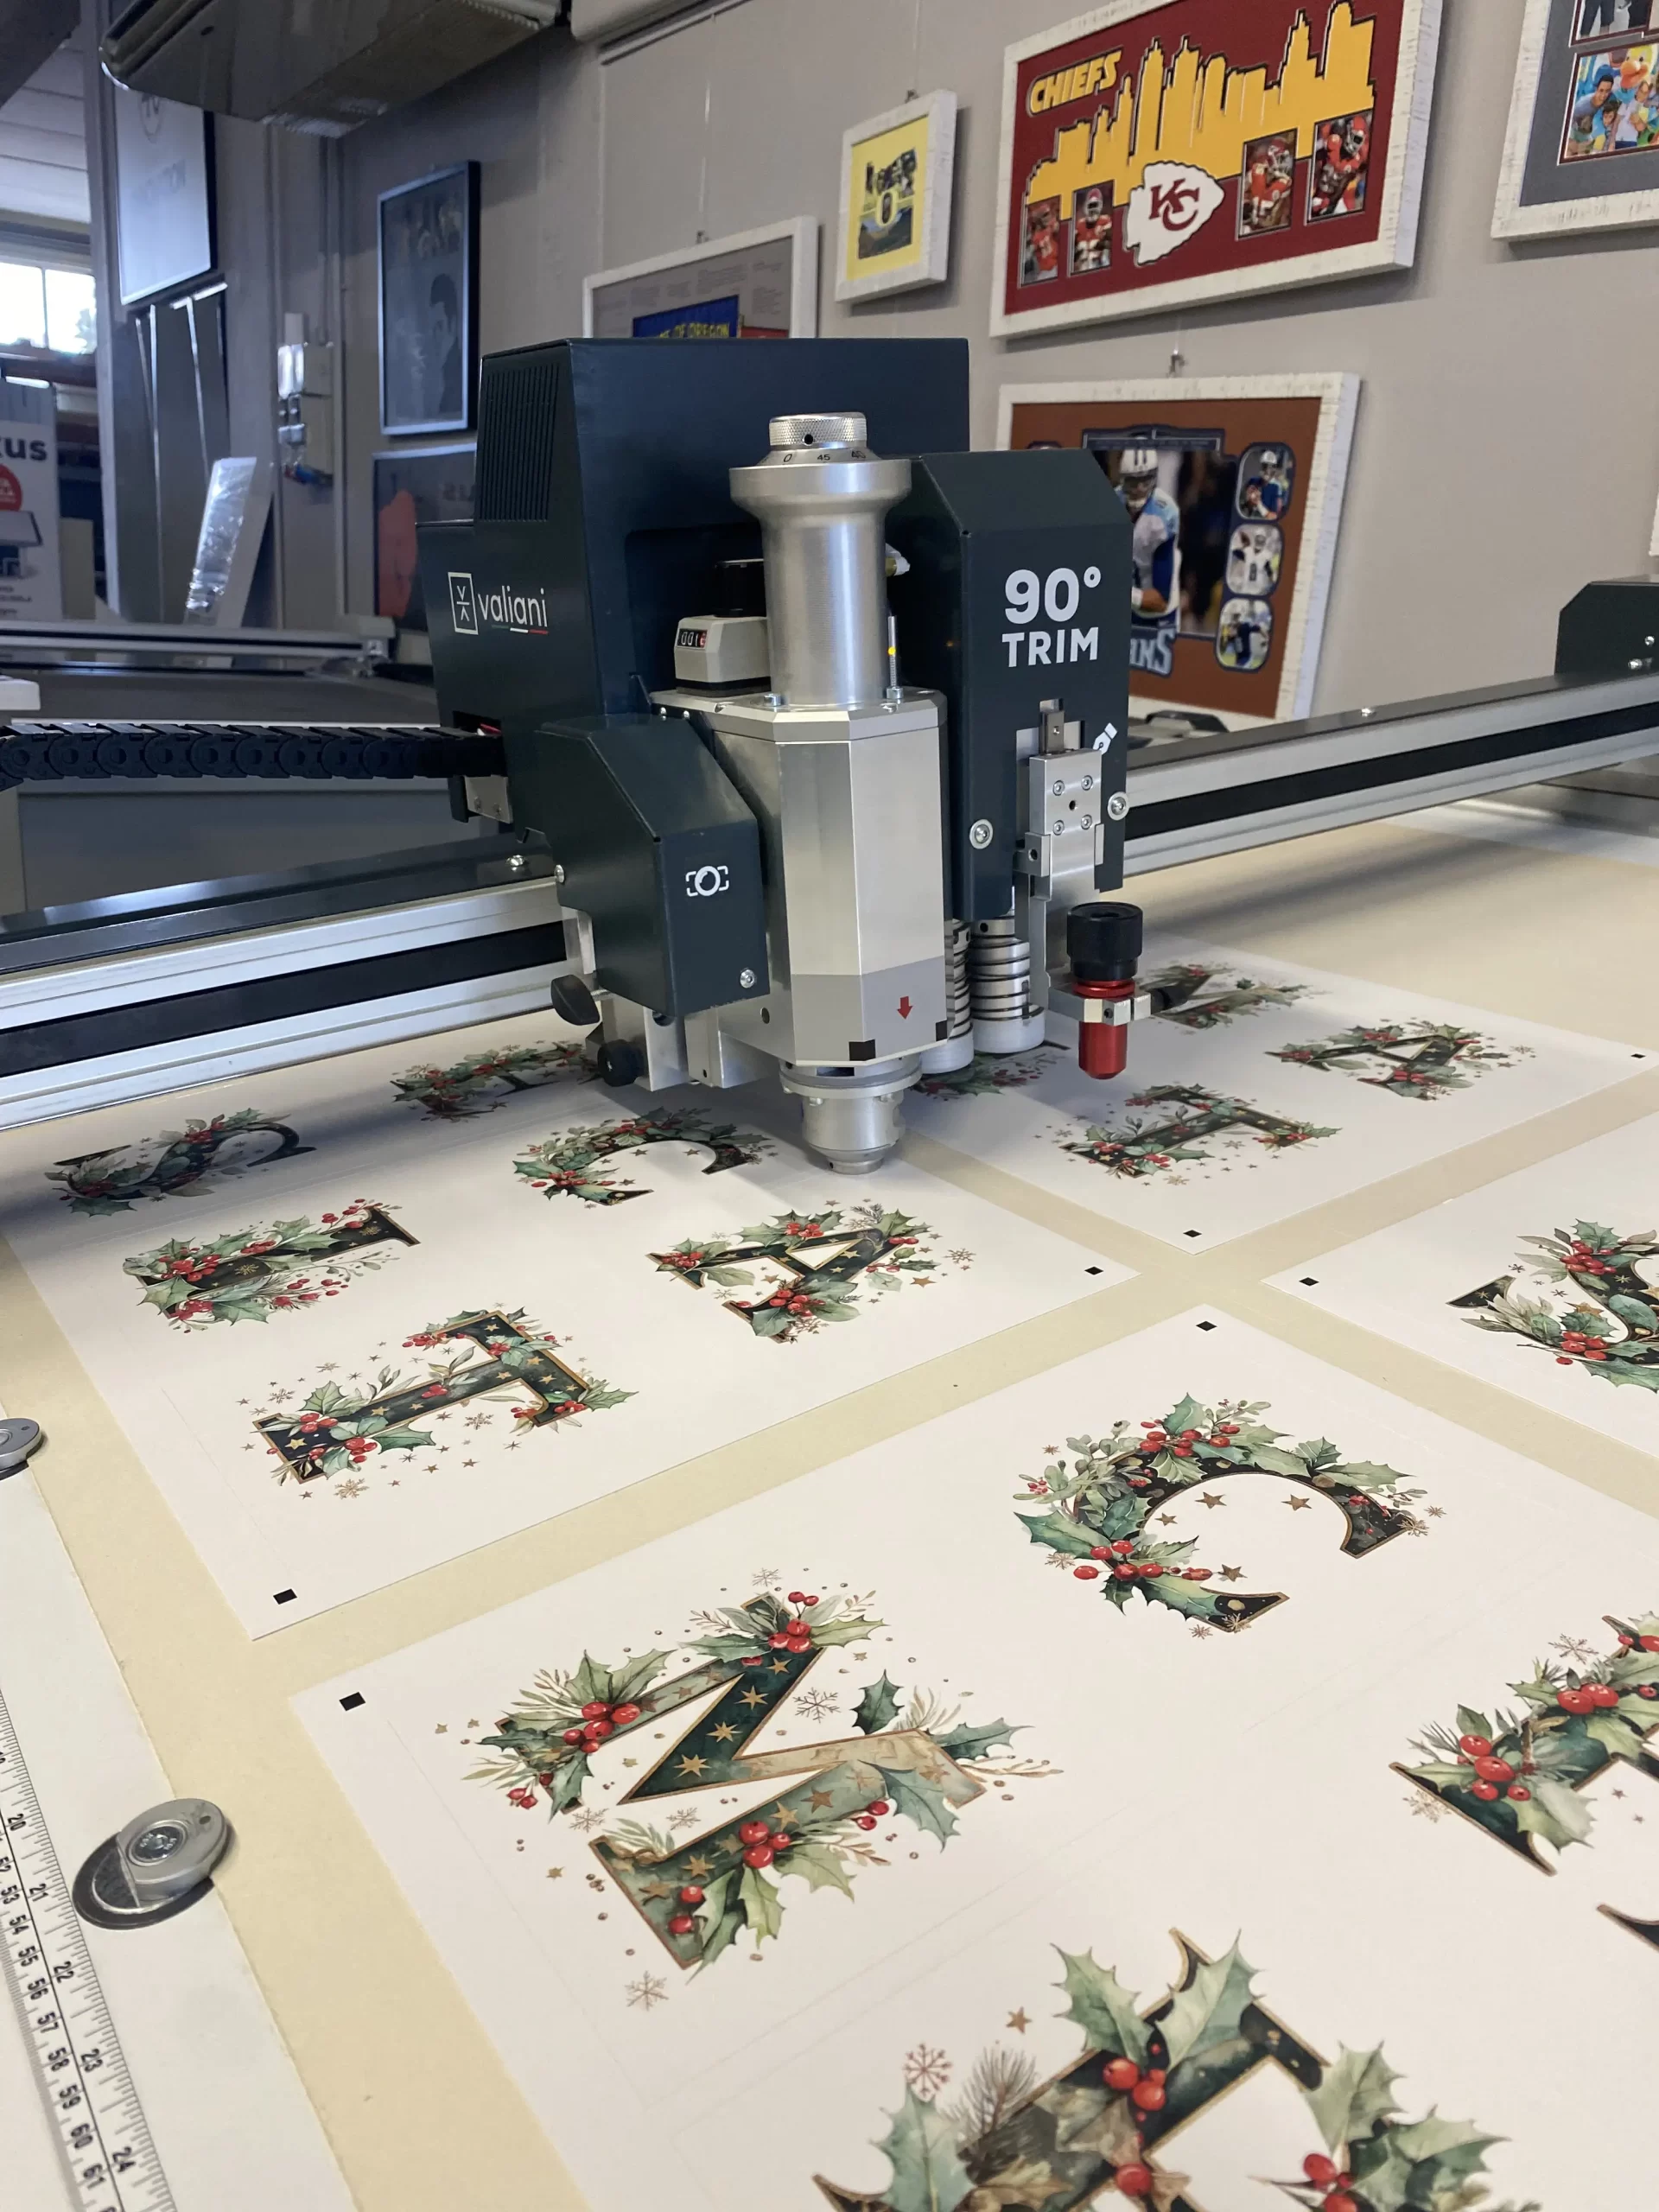
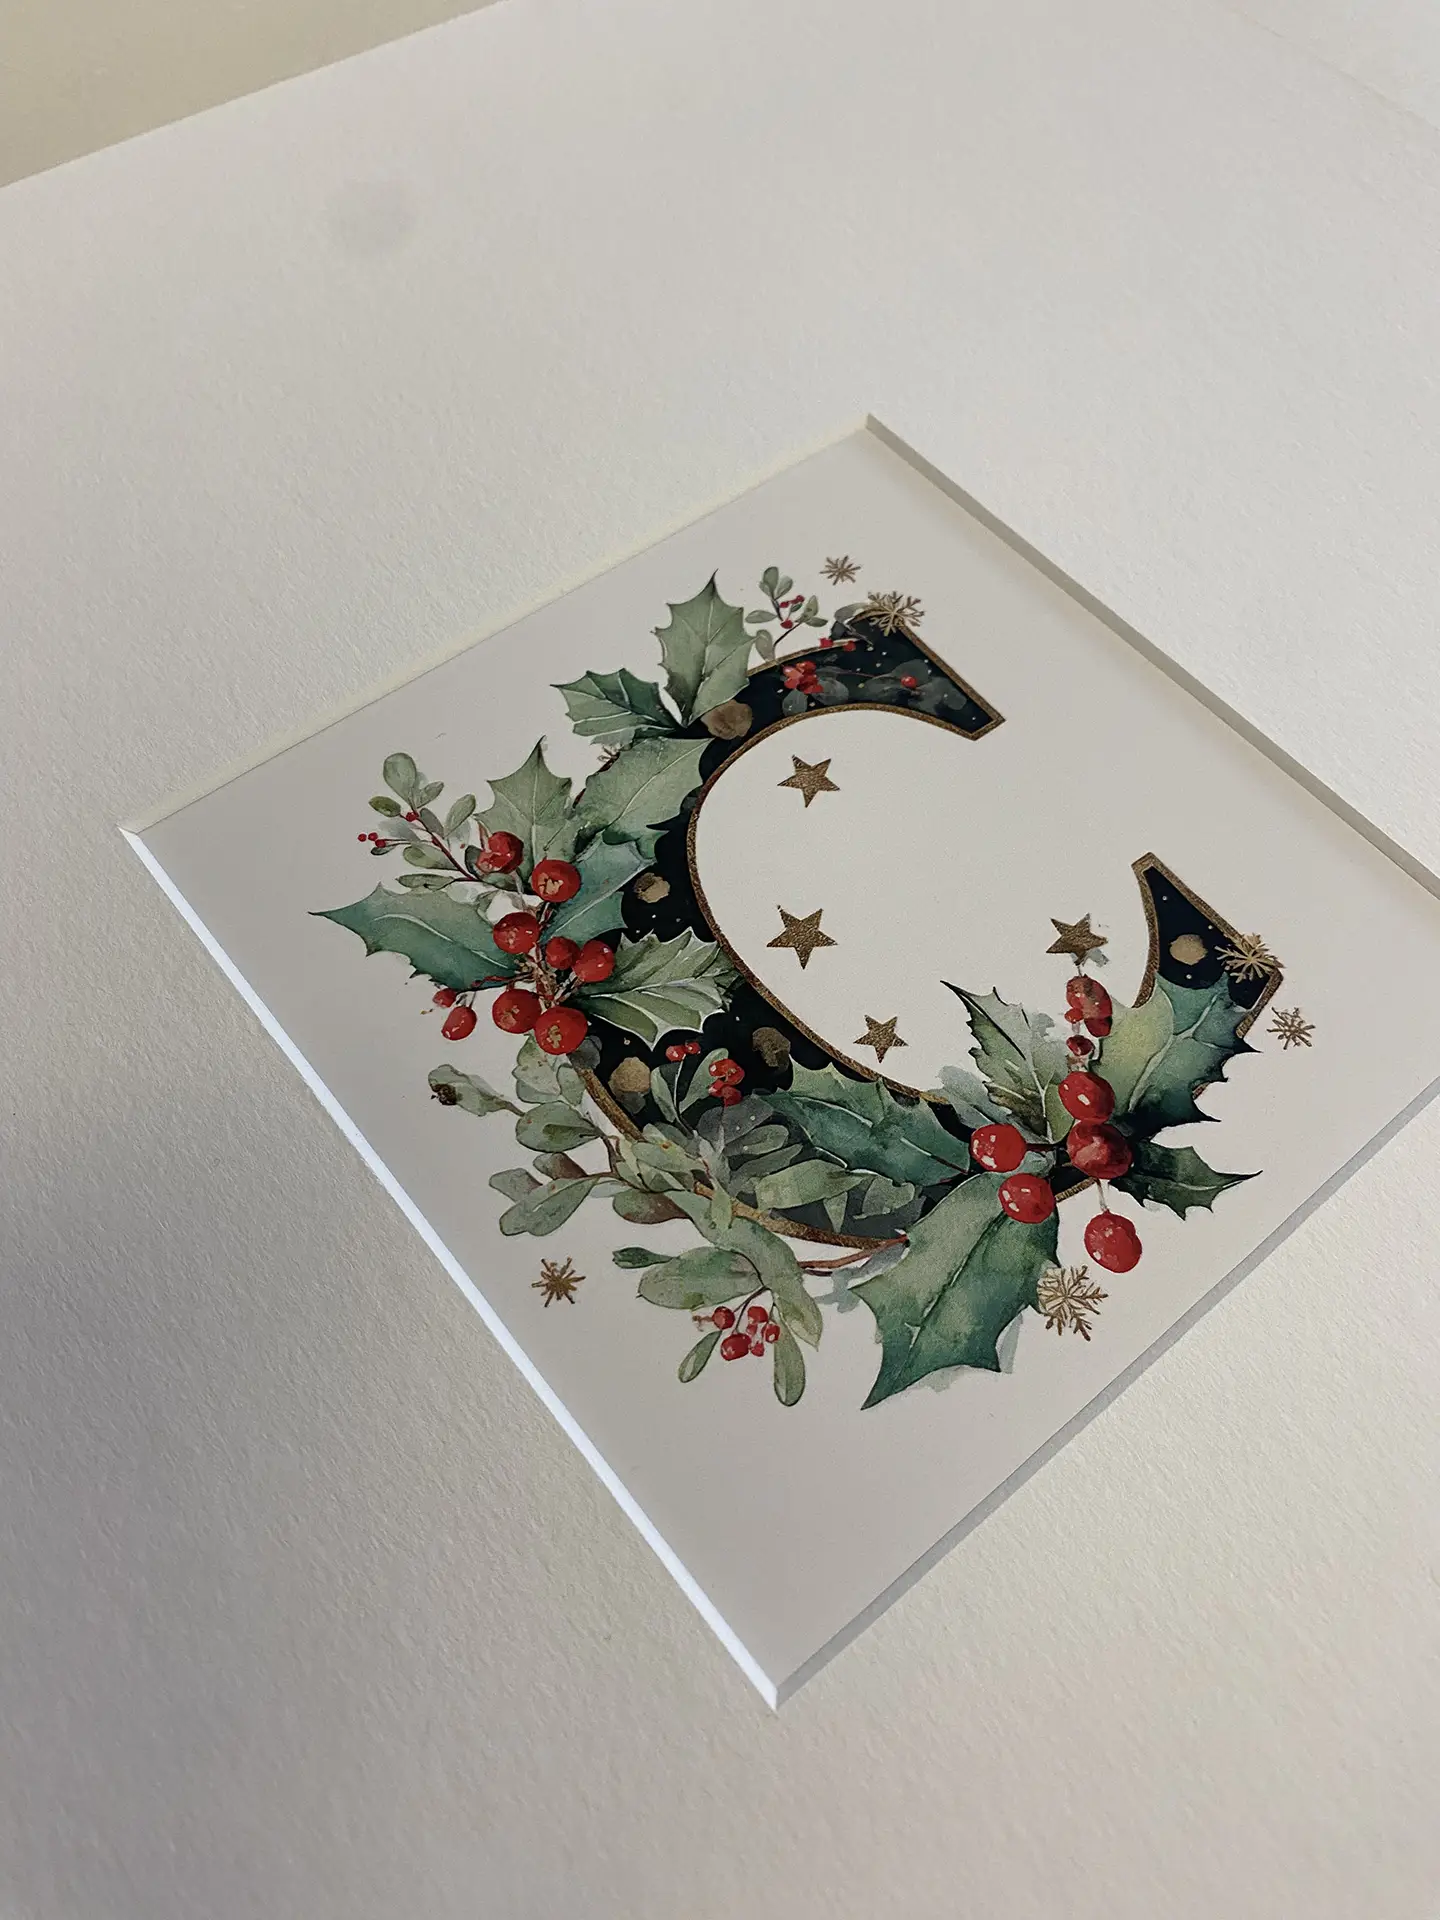
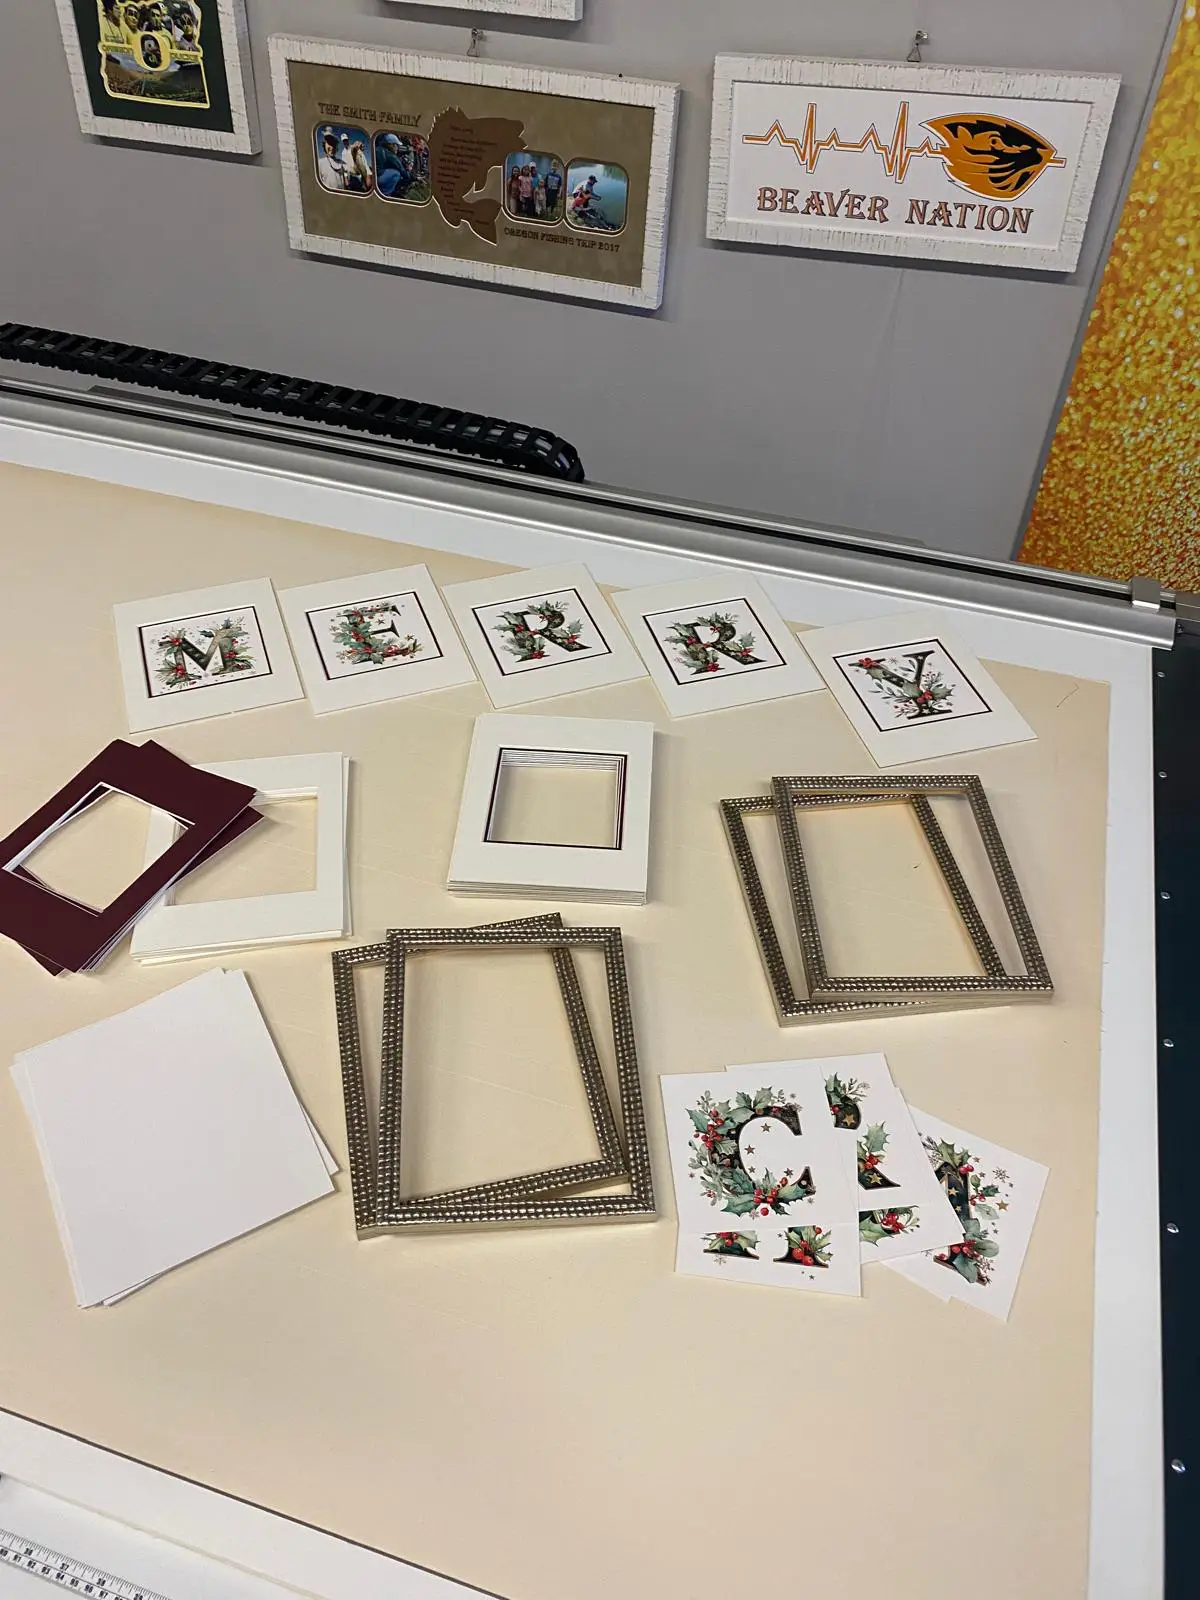
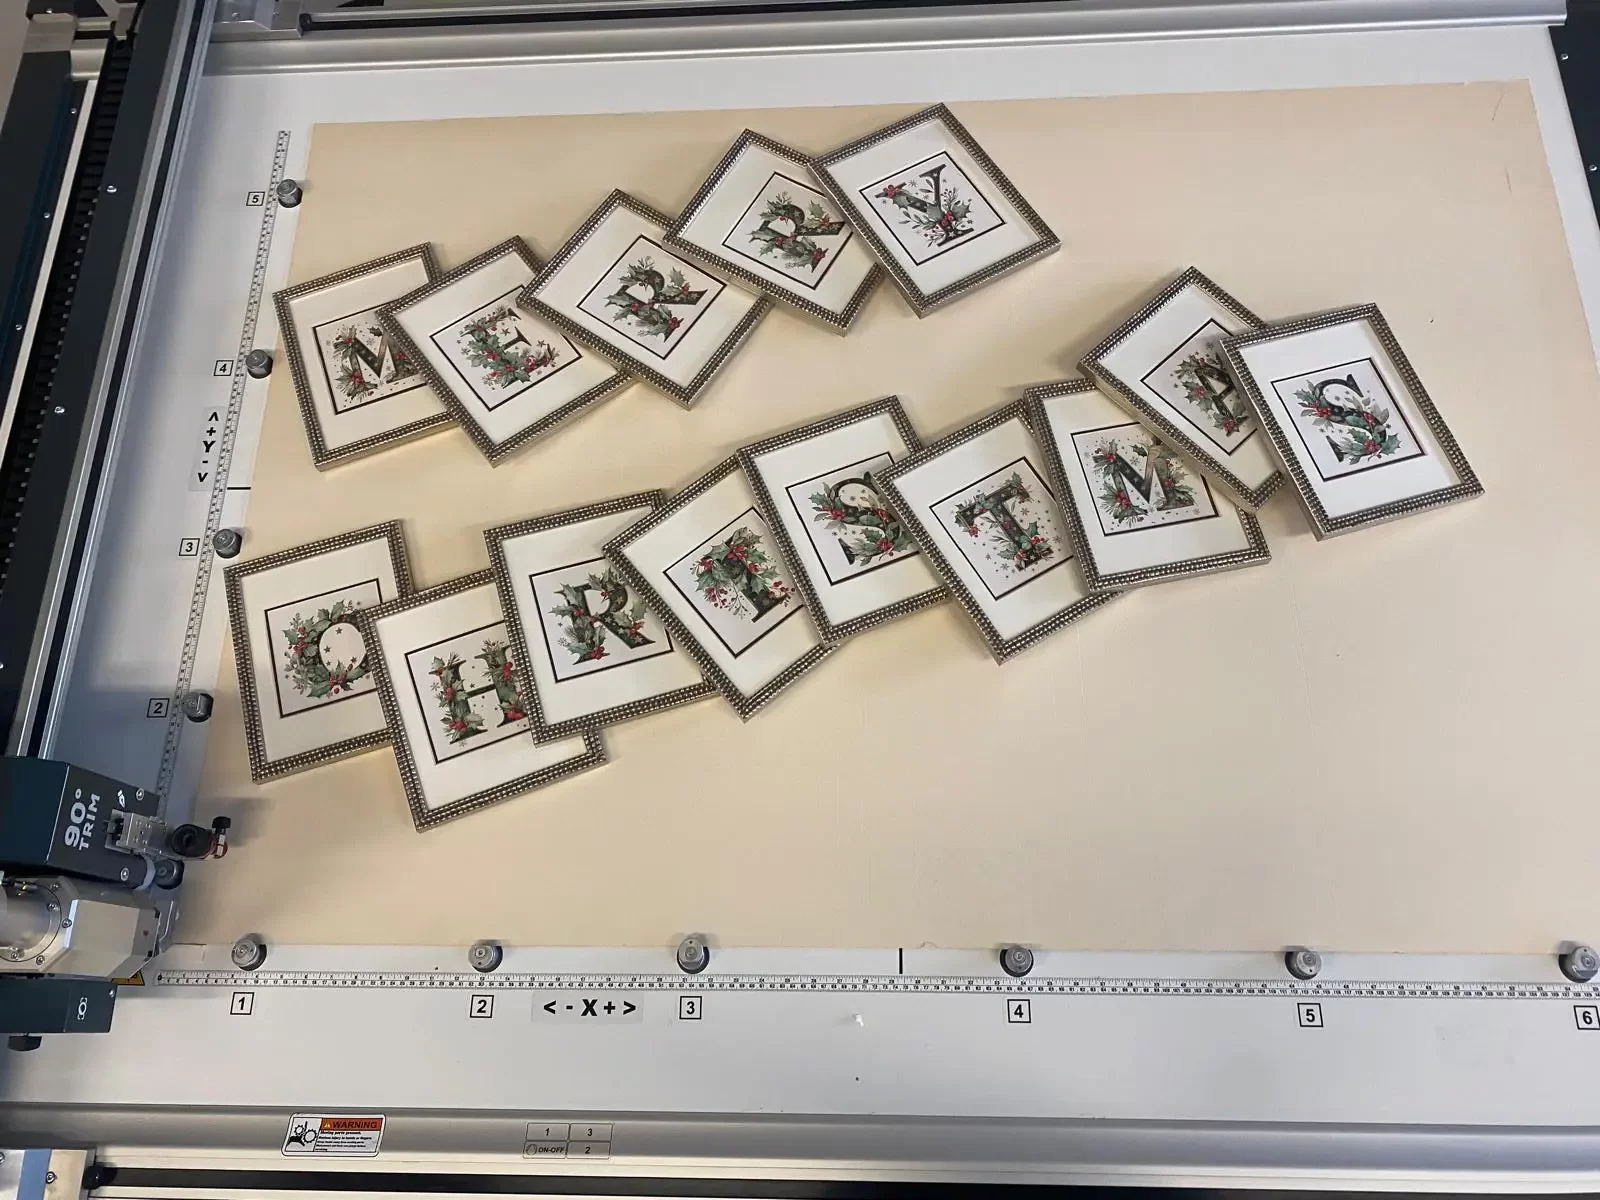
For this project, we have created double photo mountboards, ideal for holding small festive images or, as in our example, the letters forming the phrase “Merry Christmas”.

What you need for this project

MaterialsCardstock: printed cardstock for letters or images. Backing board: cardboard-like material attached to the back of a framed artwork. Mountboards: 4-ply (1.4 mm, bordeaux) and 6-ply (2 mm, white) for double mats. |
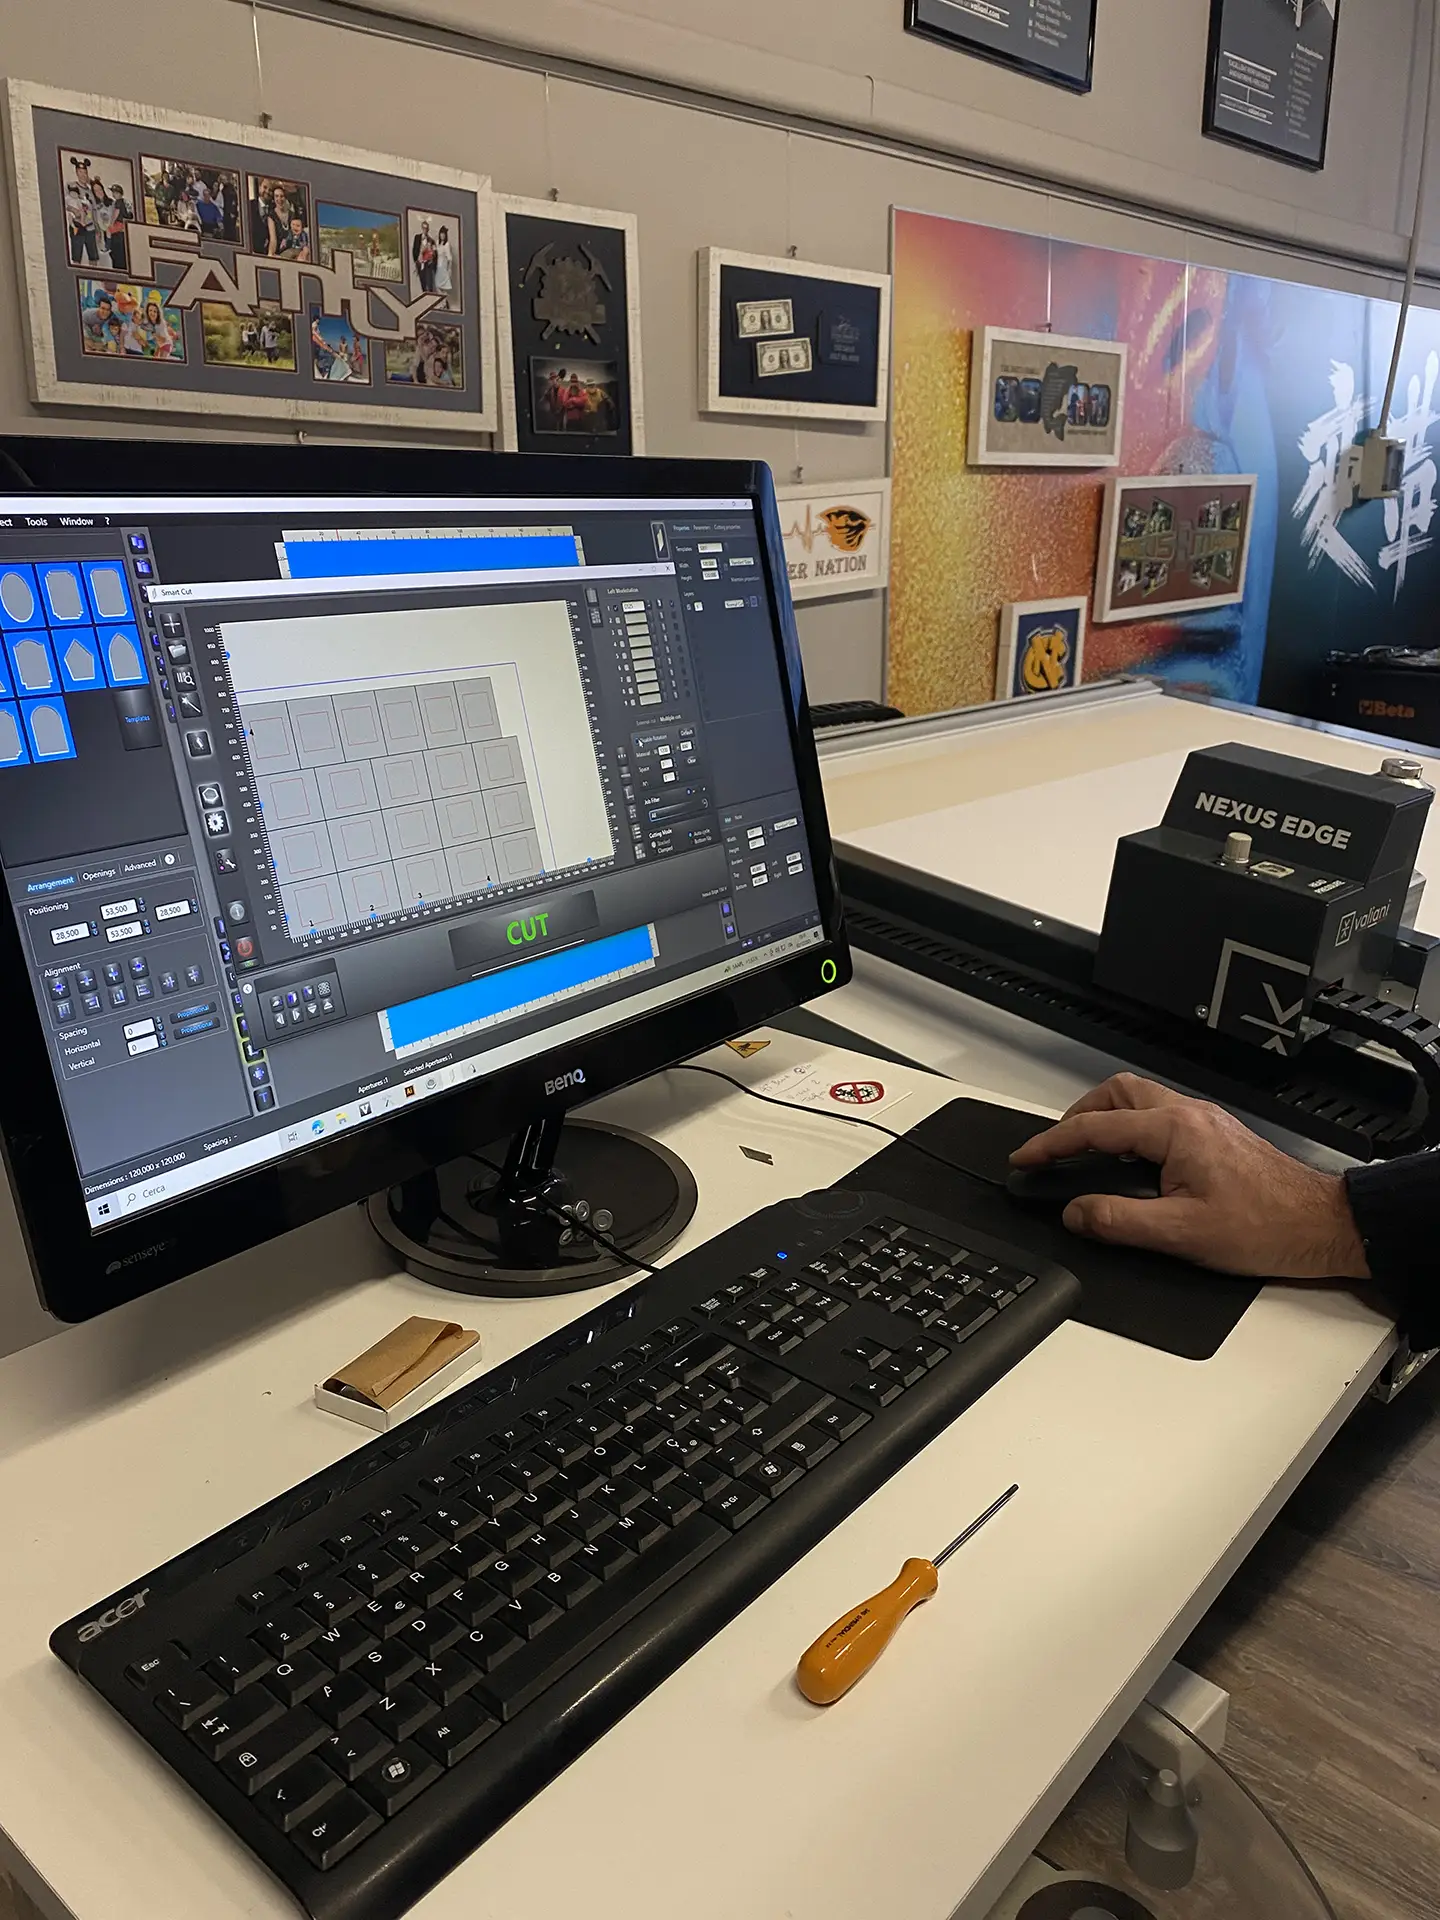
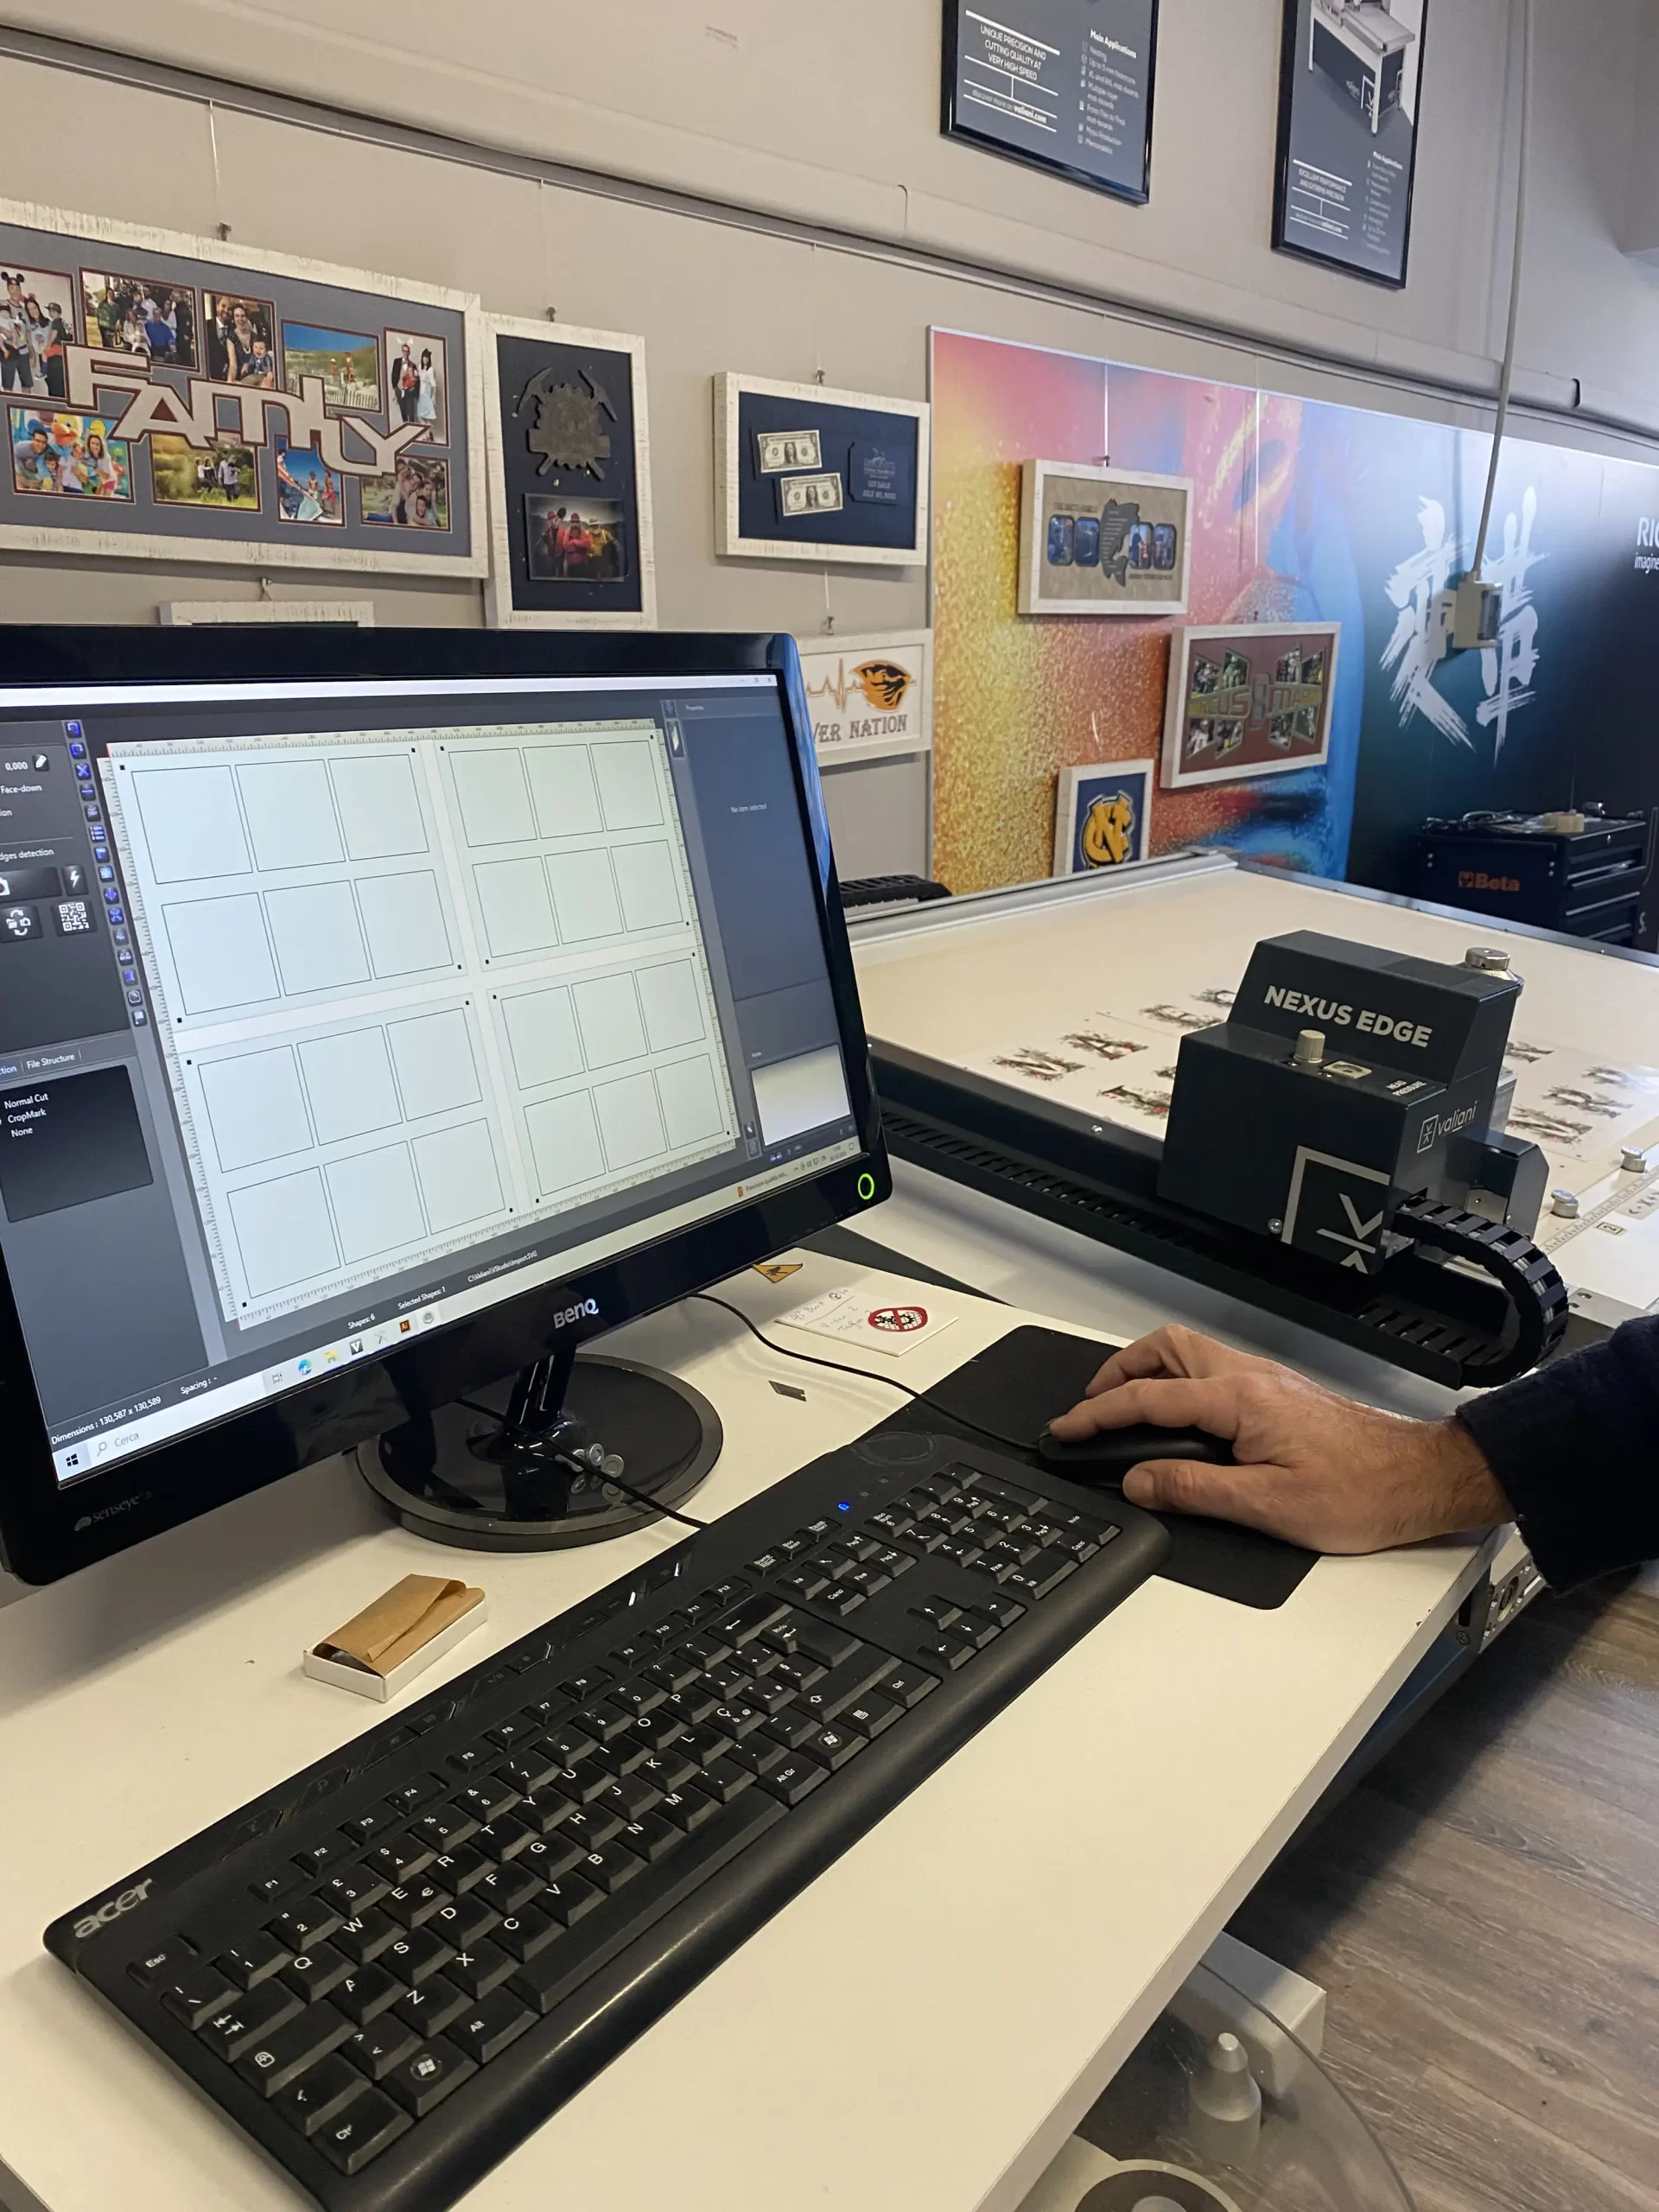
softwareV Studio: a professional software for creating mountboards. OptiCrop: for detecting print crop marks.
|
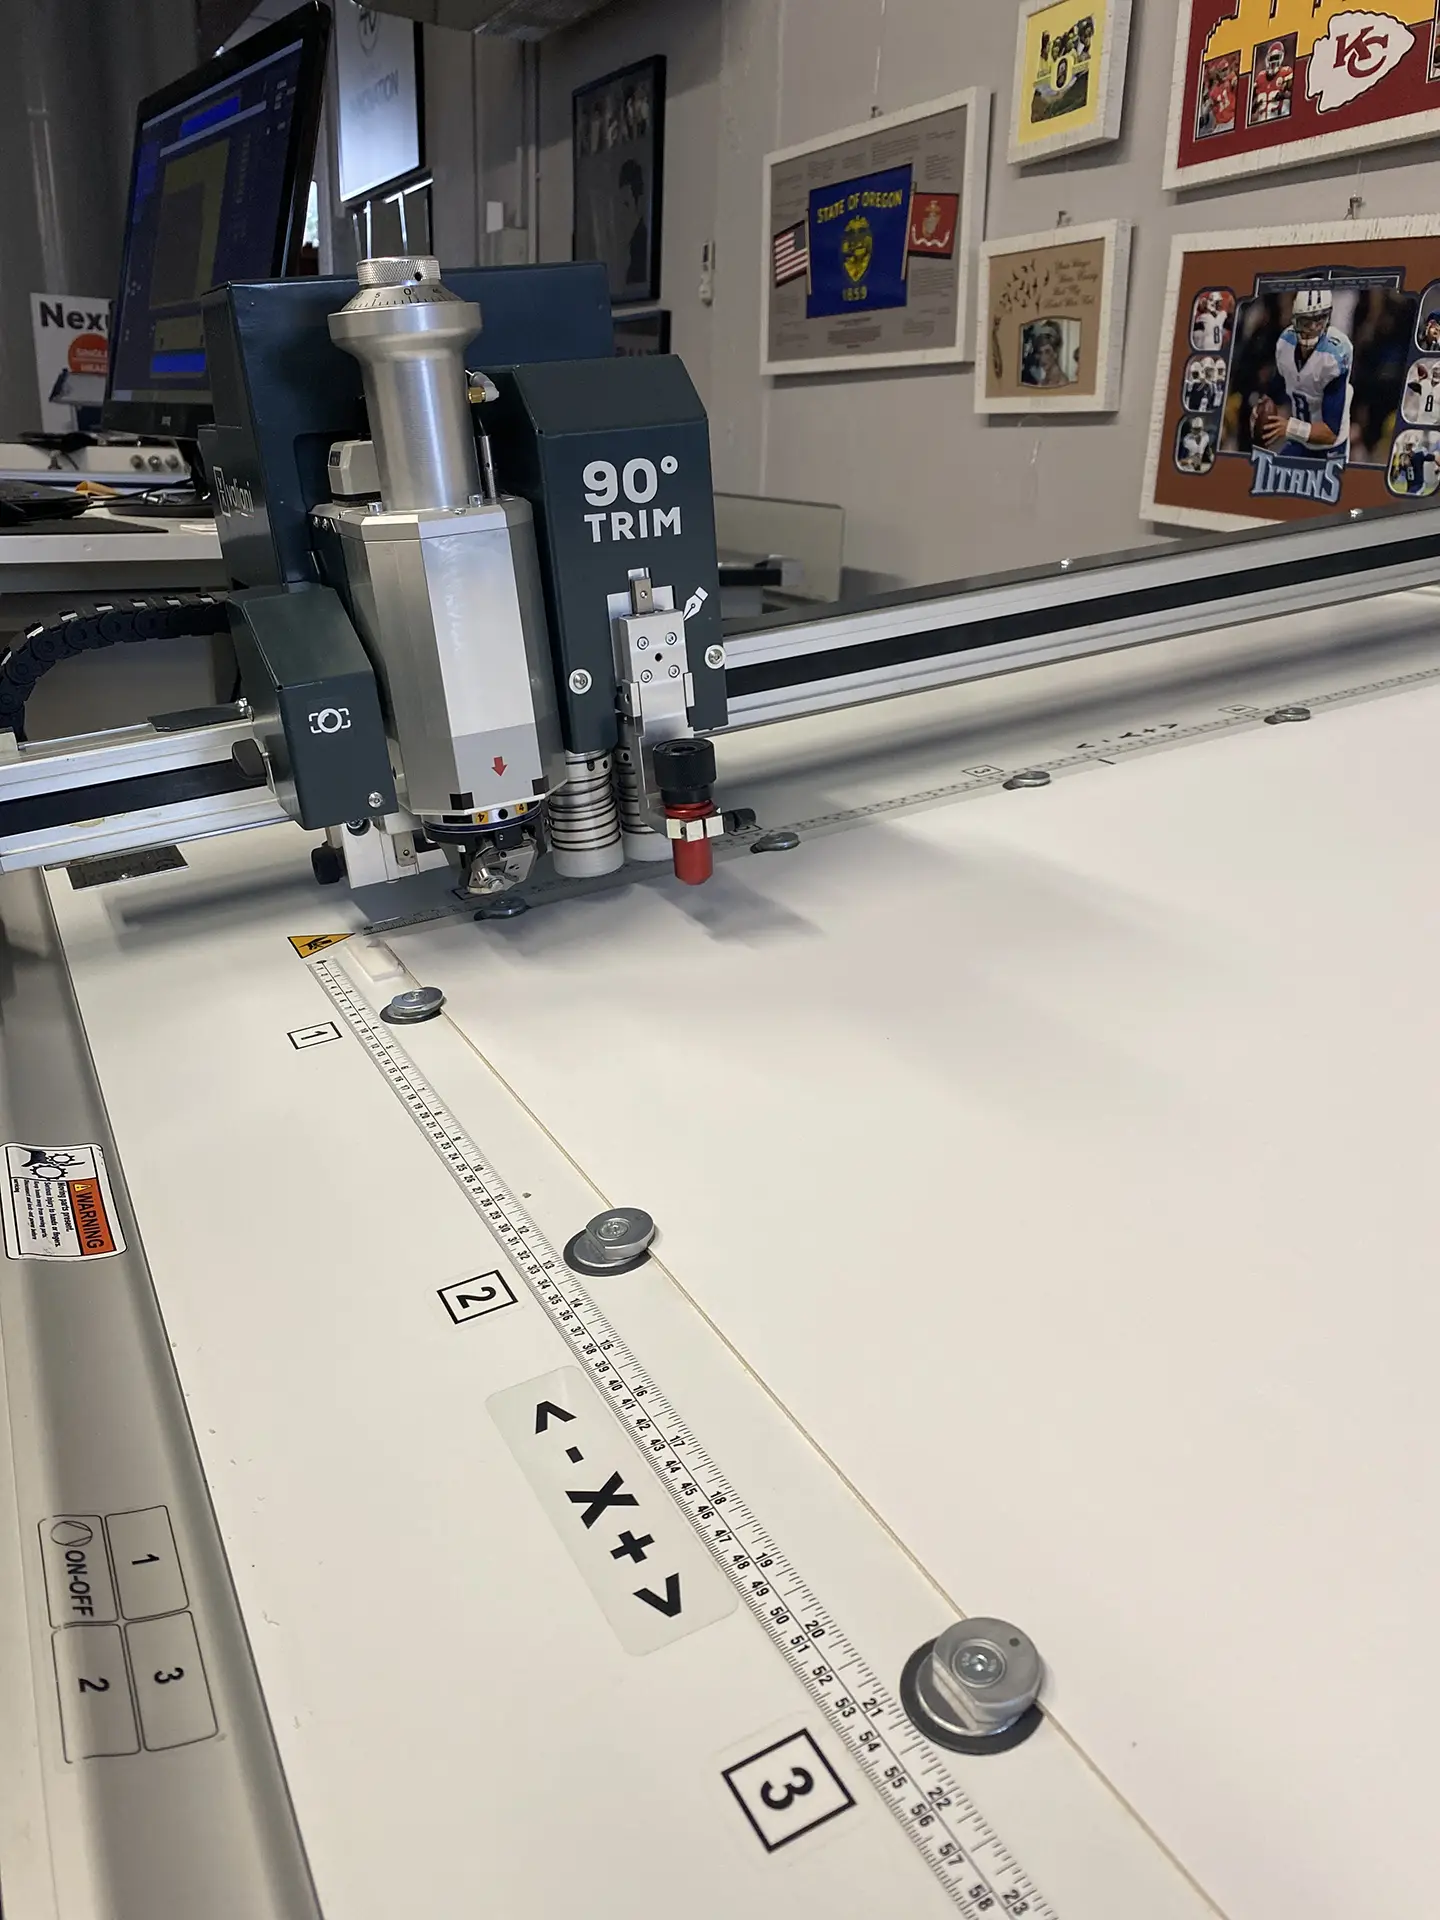
Machine |
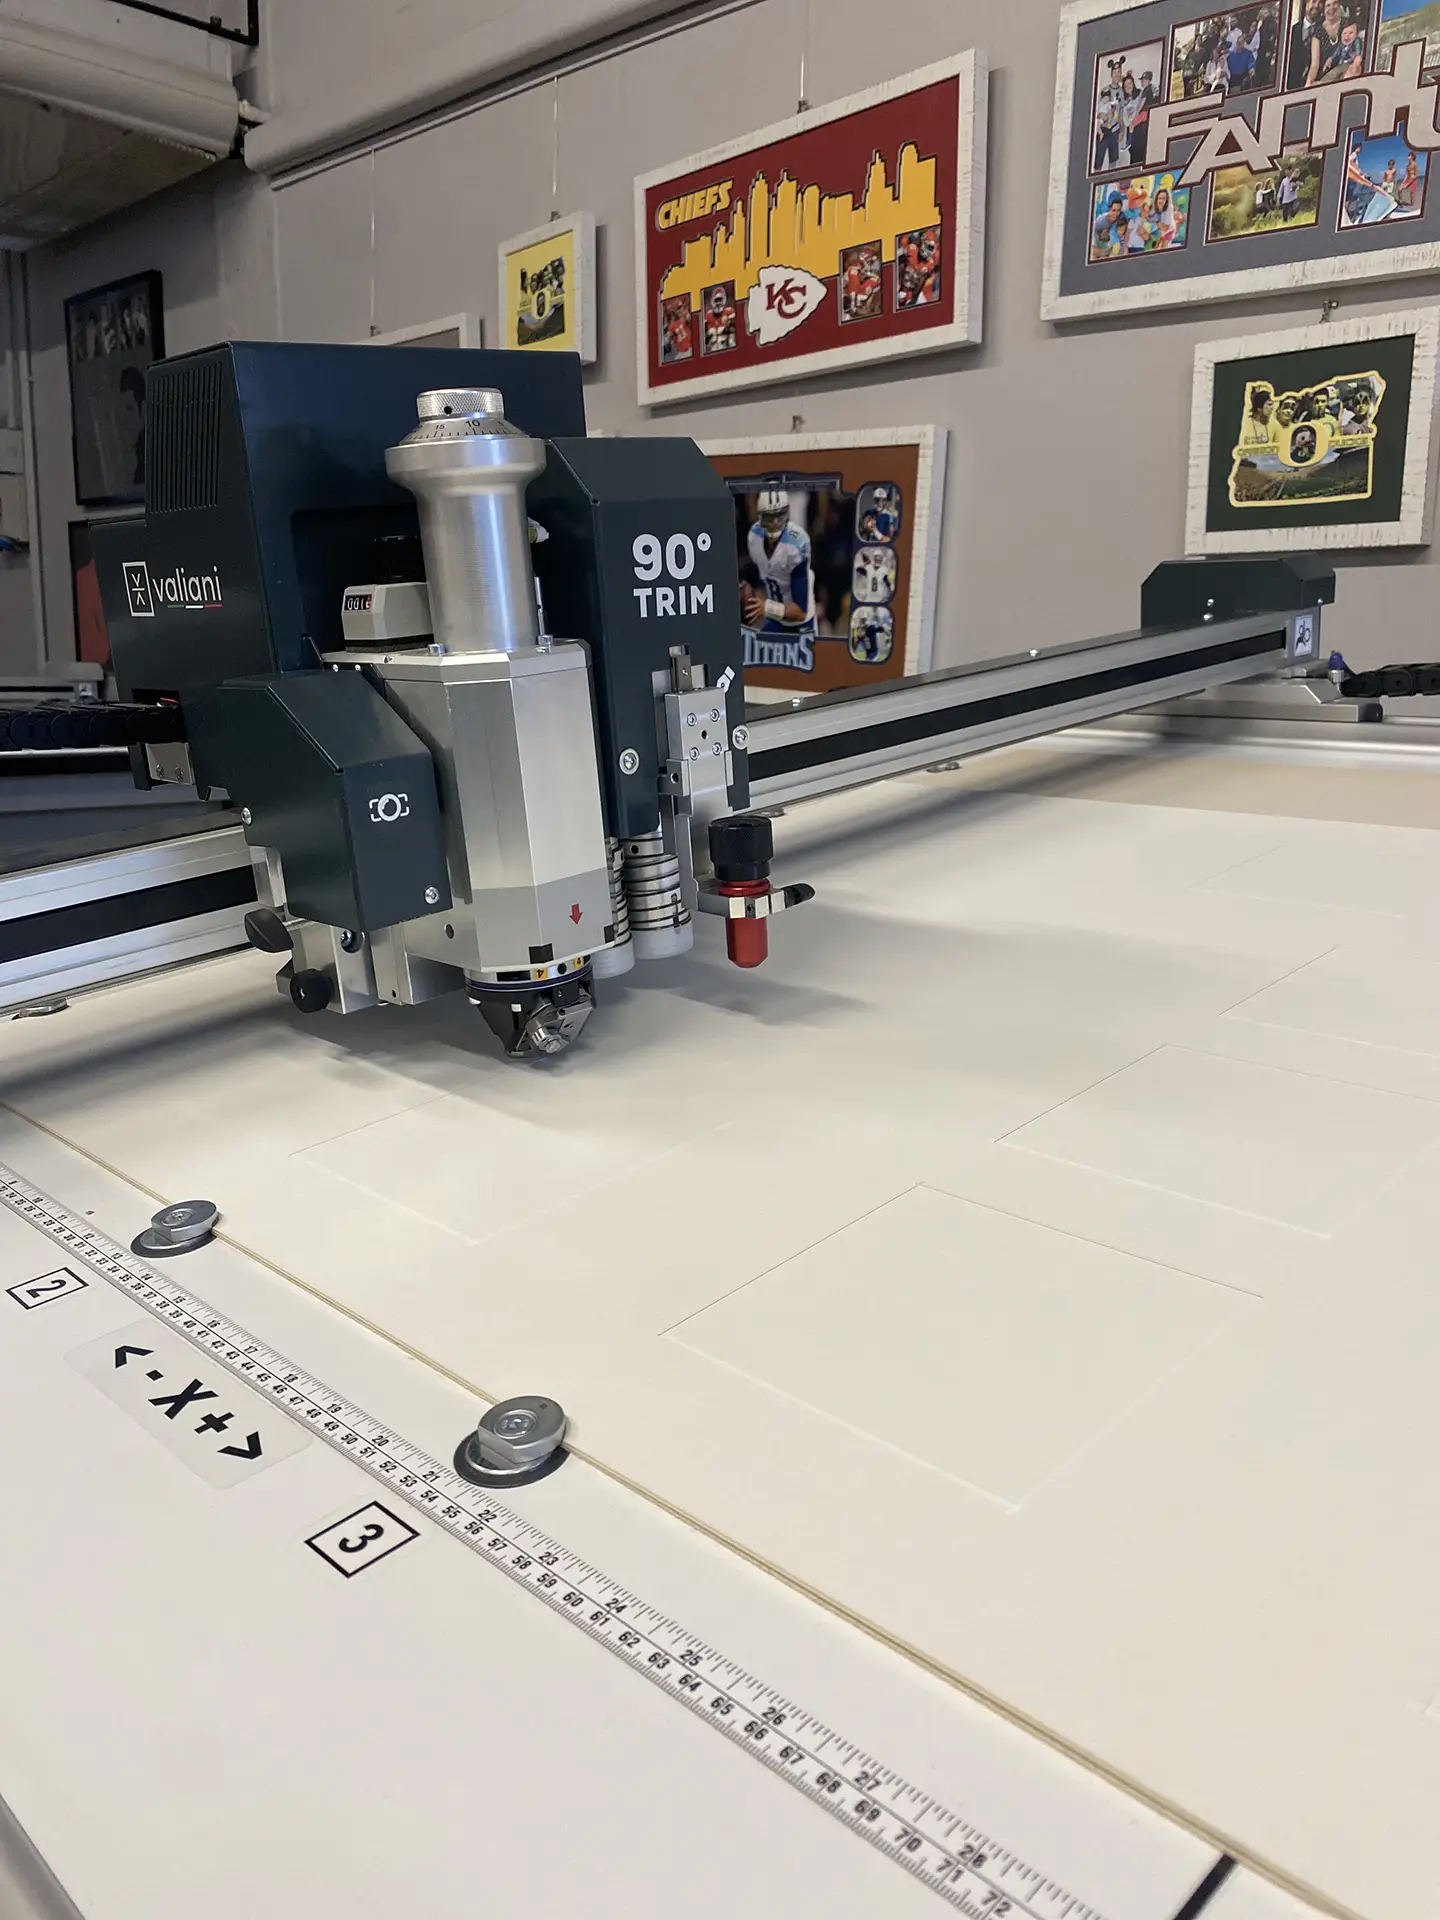
Tools45° Blue Head: ideal for cutting mats with a more pronounced bevel cut. 90° Grey Head: for cutting at 90° on any surface and shape. 90° Trimming Tool: For trimming mats at 90° without having to change the tool. Quick and precise, it also works on backing boards.
|

Process:
Cutting the printed cardstock
After printing the cardstock and applying the print regmarks, place the sheets on the Nexus Edge V worktable. Turn on the suction pump and activate the vacuum to hold the materials. Launch the V-Studio software and import the cutting file. Using the OptiCrop software, position the camera on the first regmark and start detecting all the others. Once the detection is complete, perform the contour cut using the 90° head and wait until it ends. Release the suction and carefully remove all letters.
Creating the mat
Launch the Create app and create your mat by entering the necessary measurements and the number of layers required. Select the cutting tool you want to use and send the project to the Cut program.
Cutting the backing board (frame backing)
Place the backing board on the worktable. Using the previously created file, set “None (outside cut)” mode, and start the process. Before running the job, make sure no clamps are interfering with the process; if so, rotate them to deactivate them. Turn the vacuum pump on and hold materials using the vacuum lever. The 90° Trimming Tool will handle this task by trimming the edges switch max precision. When finished, release the vacuum and collect the backing boards.
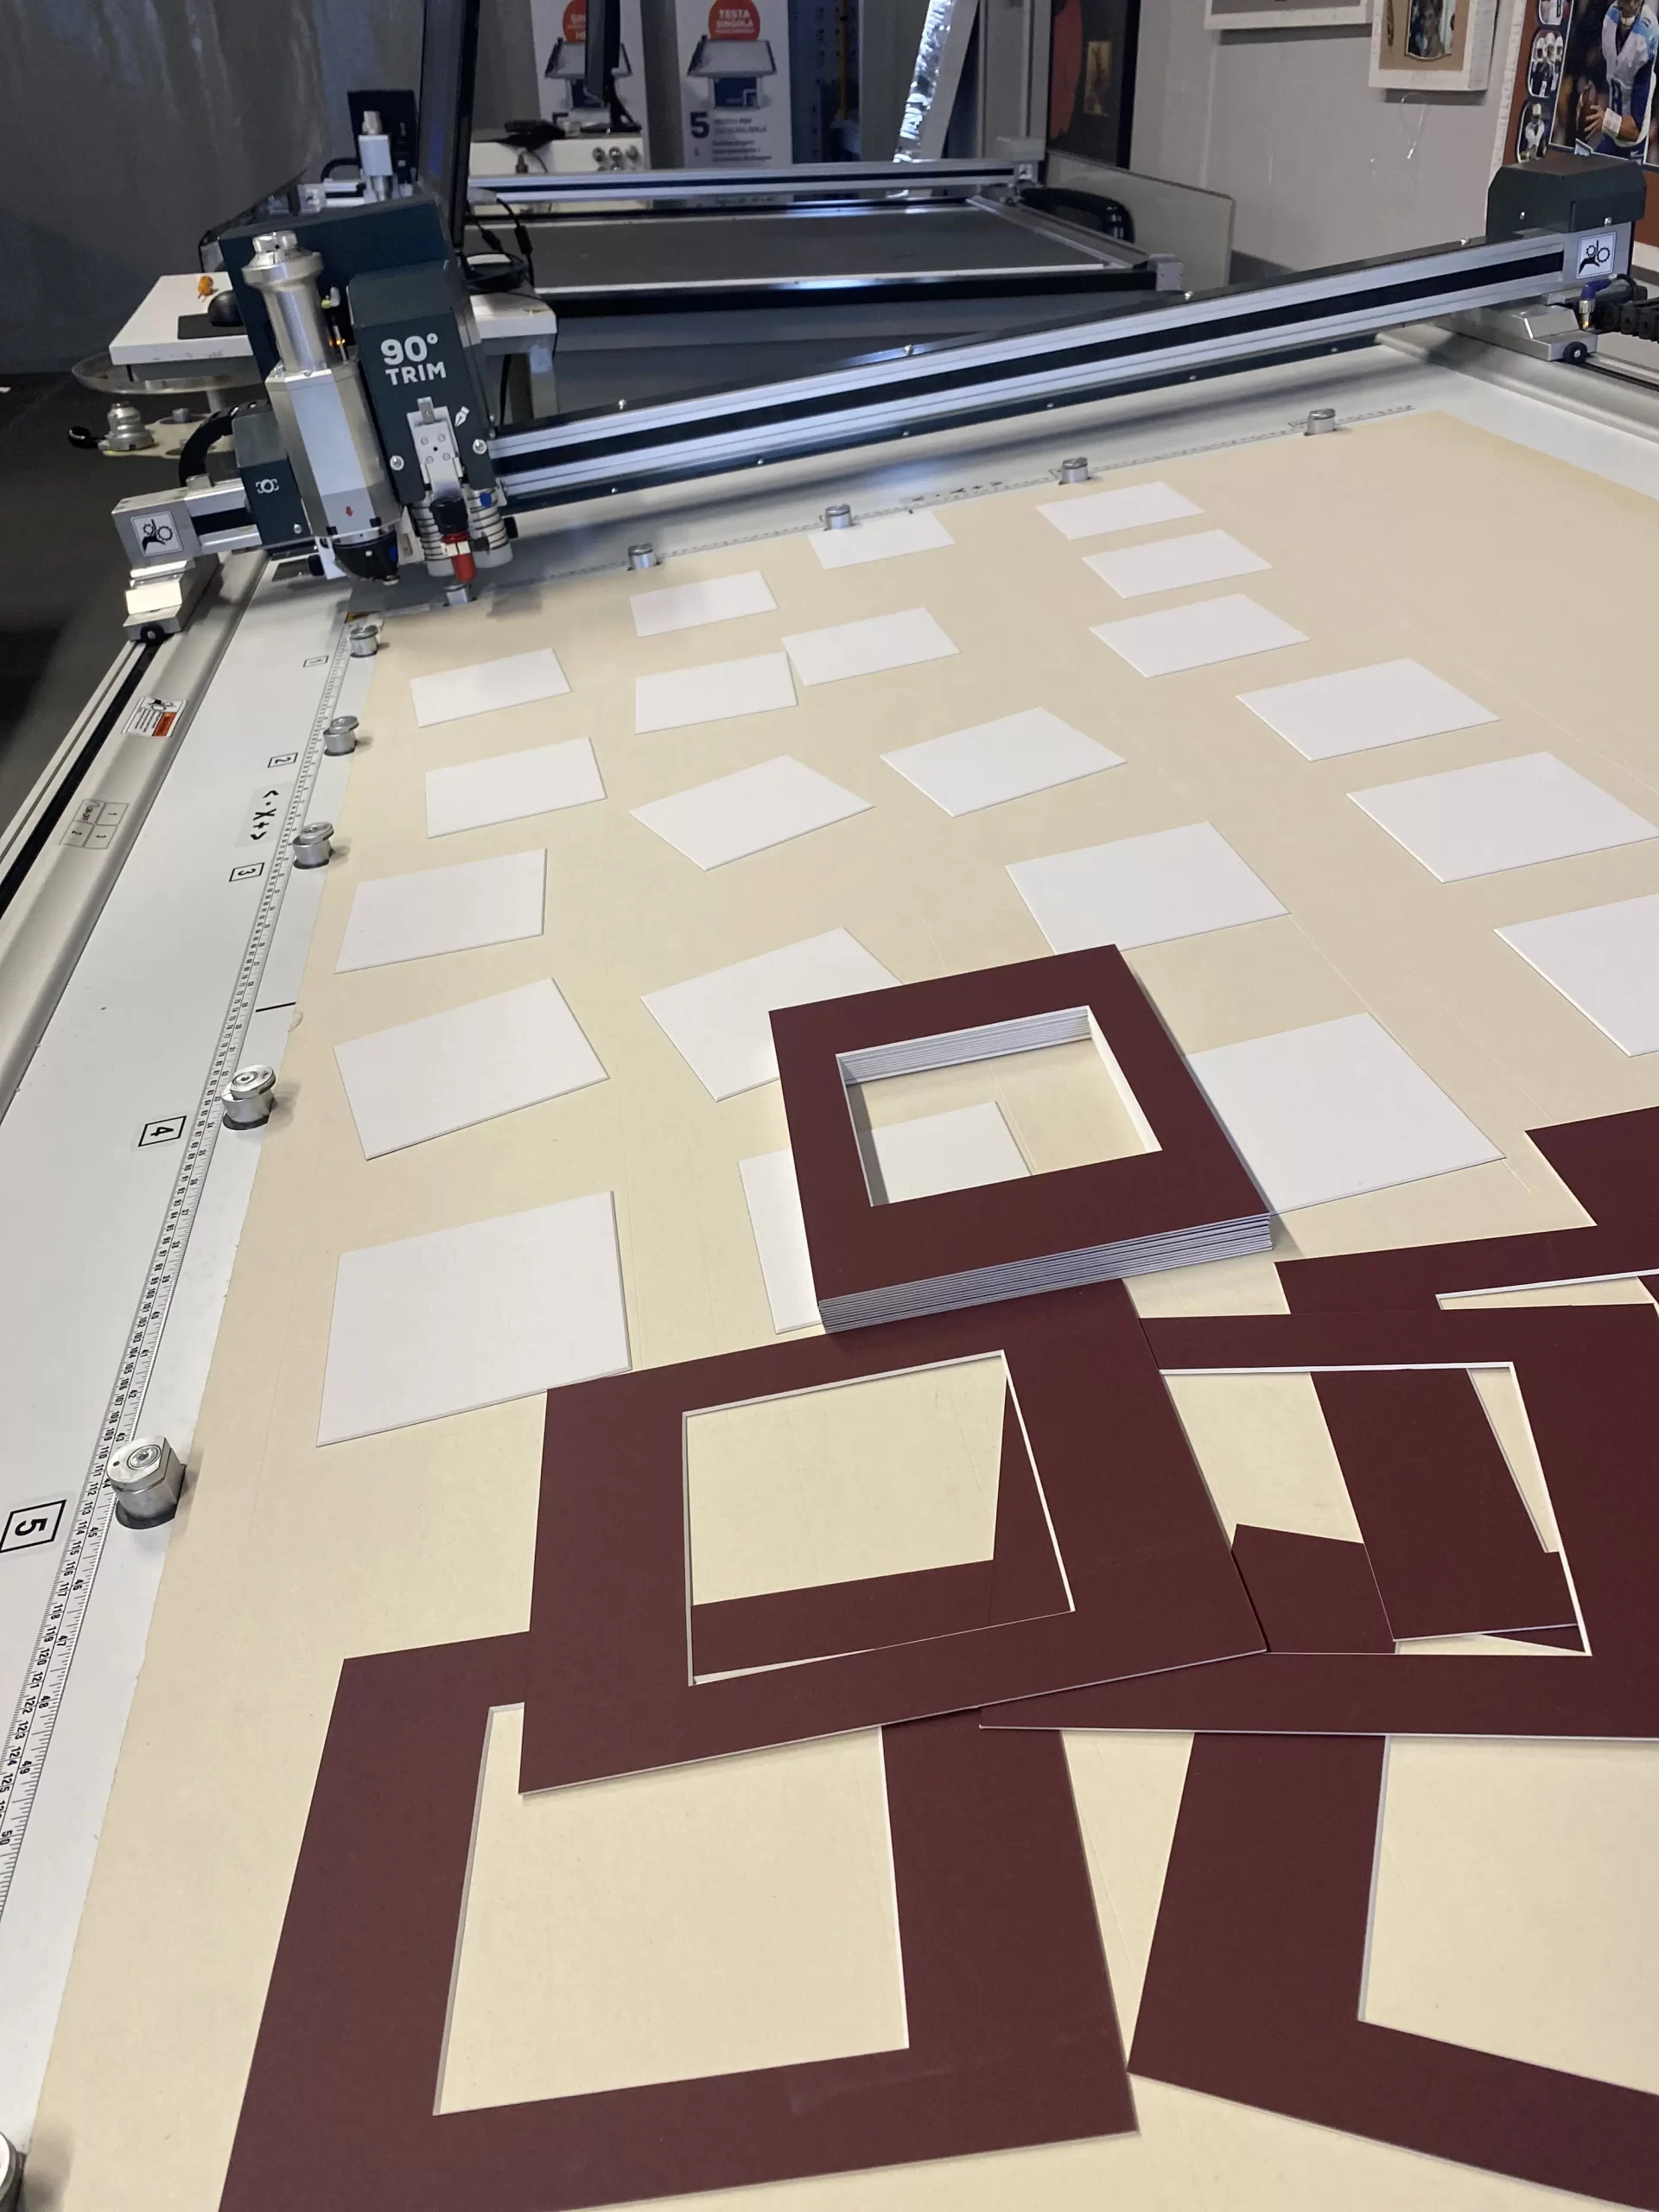
Cutting the 4-ply (1.4 mm) mountboard
Place the 1.4 mm mountboard (we chose burgundy) face down and using the file previously created, start cutting the mats. Remember to remove the ” None (outside cut)” option. The machine will first make all 45° cuts with the blue head and will finish the process with the outside trim using the 90° Trimming Tool. Release the suction and remove the mats.
Cutting the 6-ply (2 mm) mountboard
Place the 2 mm mountboard (we chose white) face-down as we did for the other layer, and repeat the same steps previously done, paying attention to choose the appropriate thickness of mountboard. Once completed the trimming operation remove the mats.
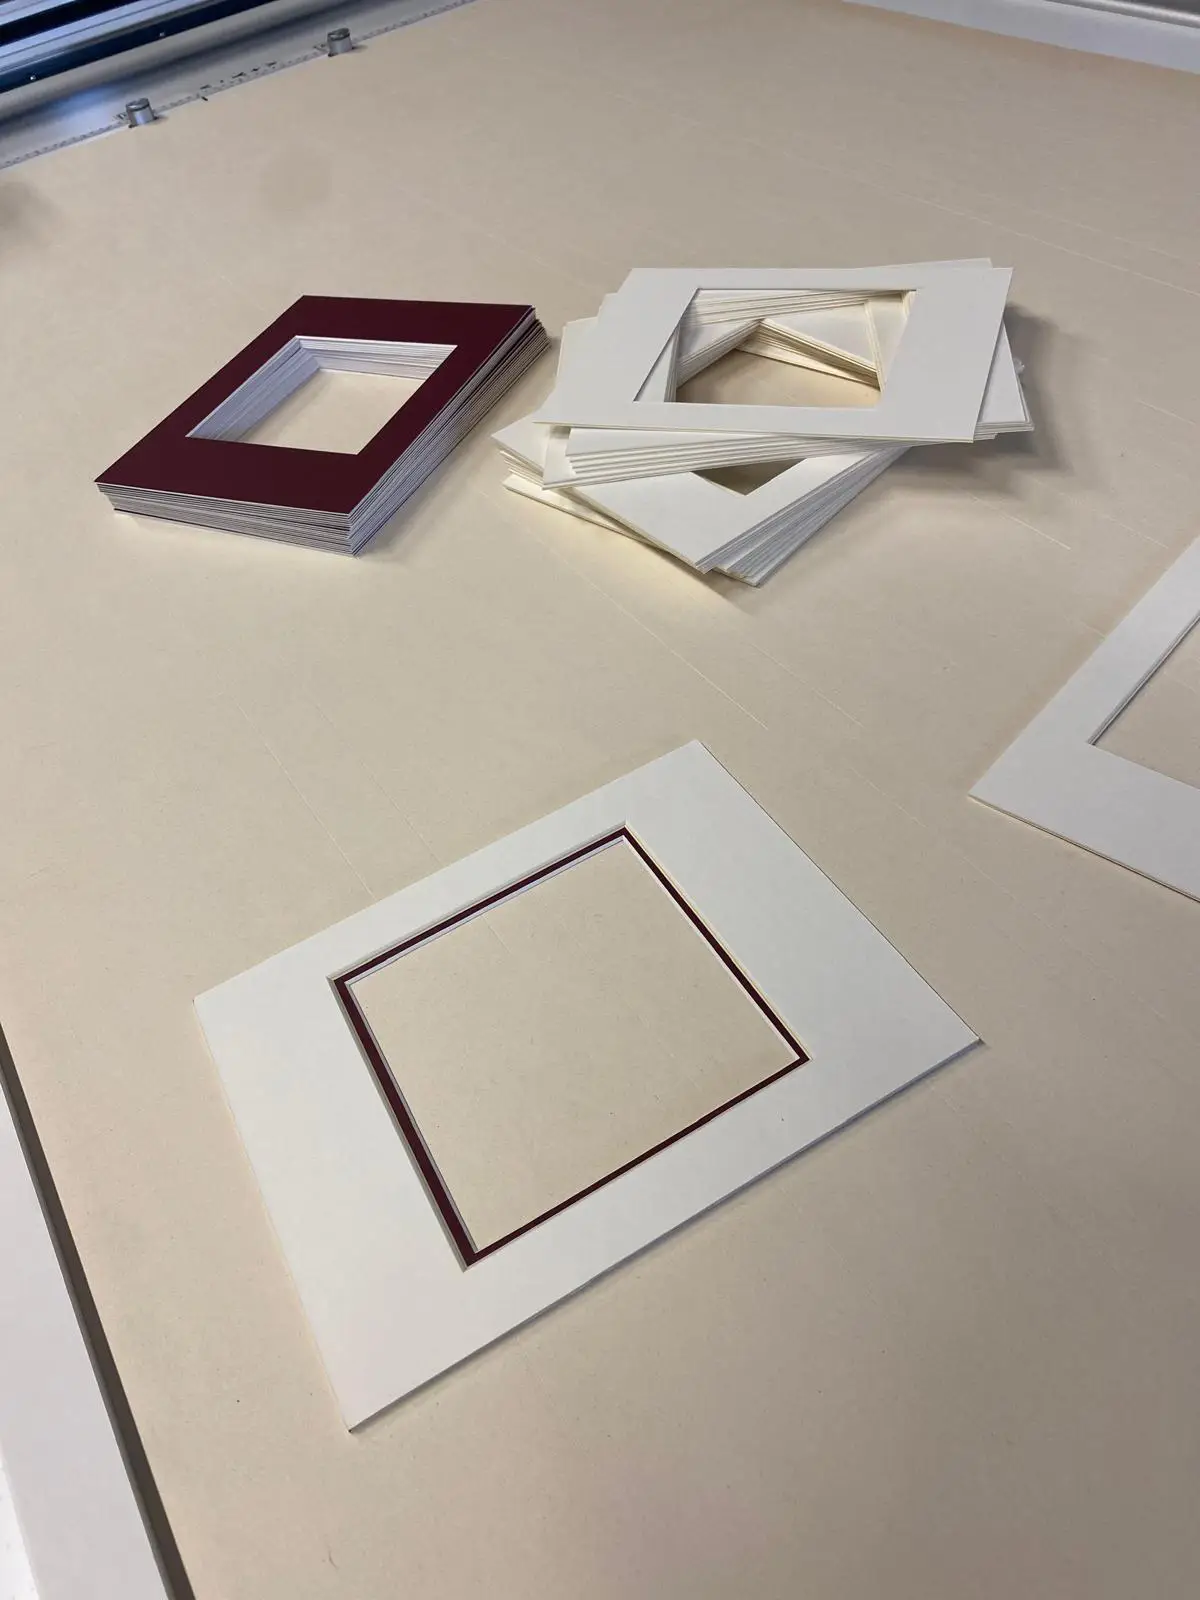
Assembling the components
Using a double-sided tape, glue the two mounts together, position the postcard, secure it with tape, add the backing board, and assemble all the various elements of your Christmas frames. We opted for the text saying, “Merry Christmas,” but you are free can to make your own choice framing images, or anything you like.
Now it’s your turn!
Have fun creating personalized mountboards and turning every frame into a unique gift.
Share your creations made with your Valiani CMC — we can’t wait to see them!